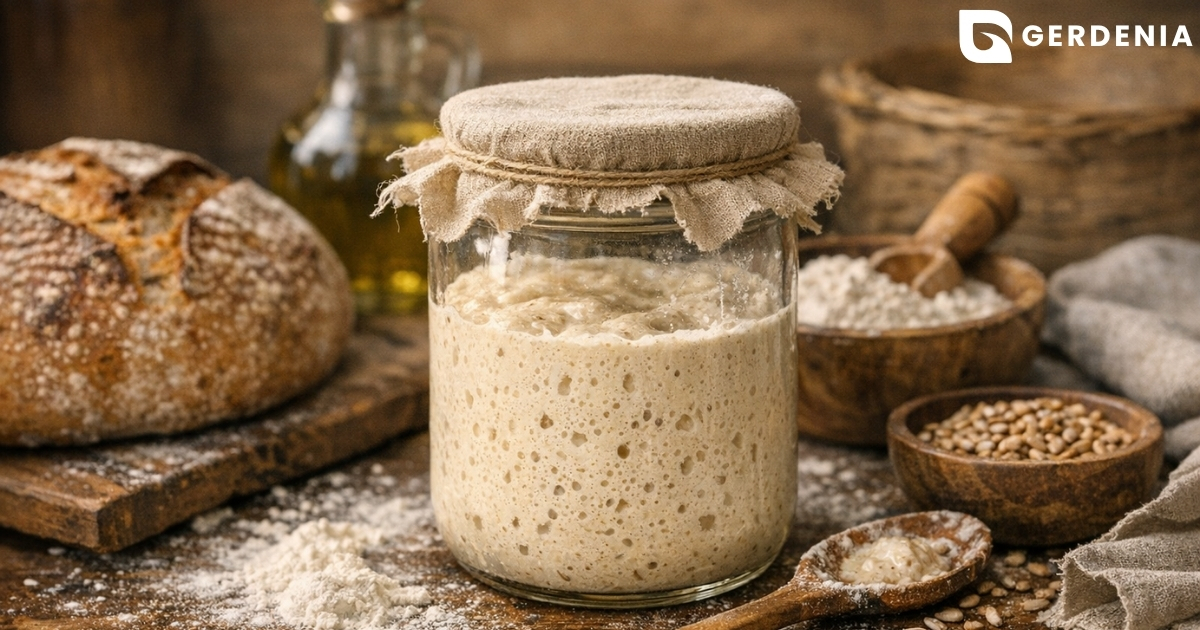
What if I told you that with nothing more than flour, water, and a little bit of patience, you could capture the invisible life floating right here in your kitchen to bake the best bread of your life? Most of us are used to ripping open a foil packet of commercial yeast, which often feels more like a lifeless powder than a baking ingredient. According to baking historians, however, humans leavened bread for thousands of years before those quick-rise packets ever existed. They relied entirely on wild yeast—naturally occurring microorganisms that are everywhere around us, just waiting for the right environment to wake up.
Mixing these two basic pantry staples together creates a cozy, nutritious trap to catch those floating microbes. Once established, this mixture becomes a living sourdough mother, acting as the flavorful engine for all your future baking. Think of this culture less as an intimidating chemistry test and more as a very low-maintenance kitchen pet. Just like a houseplant, it simply needs regular food, fresh water, and a warm place to sleep so it can thrive.
Sourdough has developed an unfair reputation for being incredibly fussy and requiring expensive professional equipment. In practice, our ancestors managed this natural rhythm using only their senses, relying on observation rather than precision tools. Making a sourdough starter does not require a pristine laboratory or an advanced science degree. Relying on simple visual cues, treat the bubbles in the jar as the culture’s breath to tell you exactly what it needs.
Over the course of about seven days, you will watch a dull paste transform into an energetic, bubbly wild yeast leaven. Setting expectations for this timeline is important, but the actual hands-on work takes only about five minutes of your day. Give the culture its daily meals, stir it until the consistency mimics thick pancake batter, and then let it rest quietly on the counter to do its work.
Every successful jar begins with a single scoop of flour and the willingness to try something new. By breaking this week-long journey down into manageable daily steps, you will quickly master the straightforward rhythms of natural fermentation. Grab a glass container and bring some true magic back into your everyday baking.

The Minimalist Pantry: Choosing the Right Flour and Water for Success
Since your starter is a living culture, what you feed it matters just as much as where it sleeps. Tap water is generally fine, but if your city treats its supply with heavy chlorine, it might stall the fermentation process by harming the good bacteria we want to grow. You can easily create safe starter water simply by leaving a cup of tap water on the counter overnight; the chlorine will naturally evaporate, leaving behind a perfectly safe drink for your wild yeast.
The food you provide is equally important, as flour delivers the essential nutrients that wake up sleepy yeast. While standard unbleached all-purpose flour gets the job done, weighing the benefits of whole wheat vs rye flour for starter can actually speed up your early success. These whole grains hold more wild yeast and minerals on their bran, acting like a vitamin-packed feast that helps your mixture reach the ideal hydration consistency—think thick pancake batter—right from the very beginning.
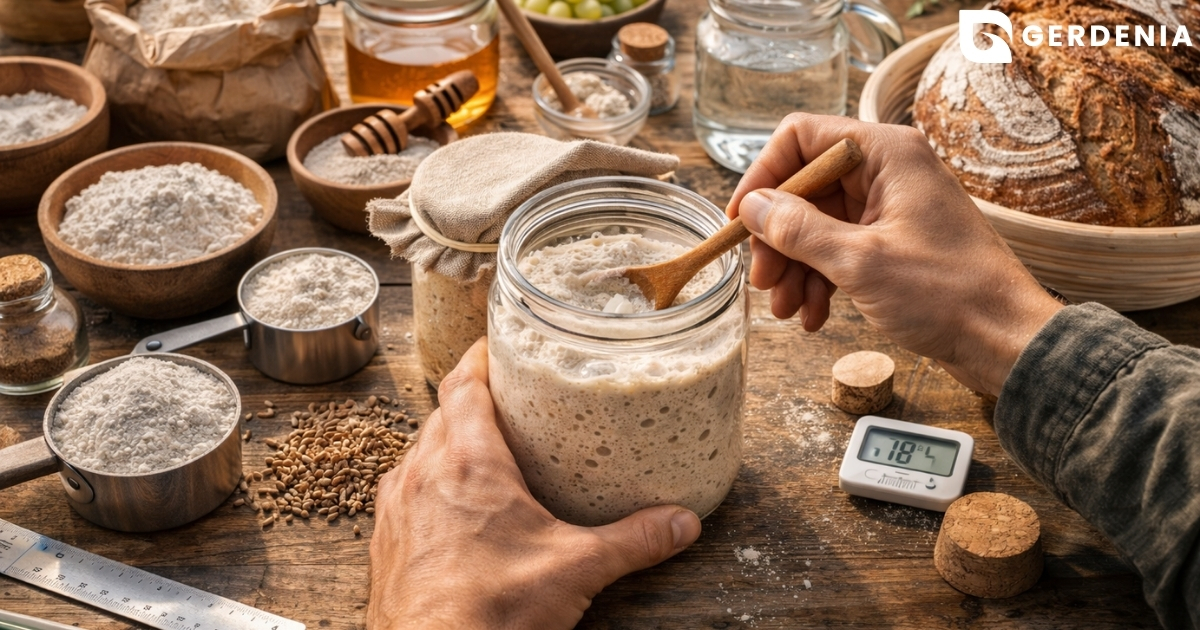
Setting up a comfortable home for your new kitchen companion requires surprisingly few tools, and you likely already have them in your cupboards. Rather than buying specialized baking gear, gather these simple everyday items to create the best glass jar for culturing wild yeast:
- A wide-mouth glass jar (for easy daily stirring and quick cleanup)
- A digital scale or basic measuring cups (whichever you prefer to use)
- A breathable cover (like a coffee filter, paper towel, or loose cloth to keep dust out)
- A rubber band (to slip around the glass so you can track how high the mixture rises)
Gathering these basic ingredients and supplies is the only real prep work required for this straightforward journey. By pairing nutrient-rich flour with dechlorinated water in a cozy, breathable jar, you set the stage for a healthy, energetic mixture. With a stocked minimalist pantry, the awakening of your wild yeast culture begins.
Day 1-3: The Awakening of Your Wild Yeast Culture
Kicking off your journey begins with a surprisingly simple introduction between flour and water. On day one, measure equal parts of your chosen flour and dechlorinated water into your glass jar—about half a cup of each works perfectly. Stir the mixture vigorously until no dry spots remain and it resembles a thick, shaggy paste, similar to peanut butter or a heavy pancake batter. Slip your rubber band around the jar right at the level of the mixture so you can track any upward movement, cover it with your breathable cloth, and tuck it into a cozy corner of your kitchen.
Within the first twenty-four hours, you might be surprised by the strange scents wafting from your jar. As the natural microorganisms wake up, they start competing for dominance in this new environment. During this initial phase, the jar might produce some funky odors, sometimes smelling a bit like old cheese, dirty gym socks, or sharp vinegar. Do not panic or throw it away; this unappealing aroma is just the temporary result of unwanted bacteria dying off as the good, bread-lifting organisms slowly take over the culture.
You may even notice an exciting surge of physical activity by the second day, complete with a bubbly surface and a rapid rise above your rubber band marker. This early explosion is actually a common false start caused by those same temporary, funky-smelling bacteria releasing gas, rather than the true wild yeast you are trying to cultivate. Recognizing this sneaky bacterial transition prevents discouragement when starting a culture. Simply stir the mixture to release the trapped air, and let it settle back down to its original height.
Following that initial burst, almost every new baker hits a psychological wall commonly known as the fermentation lull. Around the third day, your mixture will likely stop bubbling entirely, look completely flat, and seem totally lifeless. This abrupt halt causes many beginners to mistakenly throw their mixture in the trash, convinced they accidentally killed their new kitchen companion.
Think of this quiet period not as a failure, but as a deep, necessary sleep while the internal environment changes. The mixture is becoming highly acidic, which acts as a protective shield that only the strong, desirable wild yeast can survive in. The good organisms are quietly building their strength beneath the surface, establishing a safe, healthy home before they begin feeding and producing the energetic bubbles we want.
Pushing through this flat, quiet phase requires nothing more than a little patience and a gentle daily stir to keep the oxygen flowing. Your main job during these first seventy-two hours is simply observing the changing aromas, watching the false bubbles rise and fall, and trusting the invisible transition happening inside the glass. Once the environment stabilizes and the sleepy yeast takes control, the culture becomes hungry and ready for routine feeding.

Day 4-7: The Routine of Discarding and Feeding
Surviving the quiet lull of the first few days means your culture is finally hungry, marking the shift from simply watching a jar to actively managing a living ingredient. When building a starter, the most common mental hurdle is the concept of throwing away perfectly good flour. If you simply kept adding food to your jar every day without removing any, you would quickly end up with a massive jar of hungry yeast that requires entire bags of flour just to survive. We manage this growing population through a daily process called discarding, which ensures the remaining organisms have plenty of fresh food to eat without overflowing your kitchen.
Removing half of your mixture might feel wasteful at first, but think of it as necessary population control for your new microscopic pets. By keeping only a small amount of the culture, you create the perfect environment to introduce the “1:1:1” method, which simply means mixing equal parts of starter, fresh flour, and water. You do not actually have to throw the removed portion in the trash, either; once your culture is safely established, saving this extra batter opens up a whole new world of sourdough discard recipes for pancakes, crackers, and muffins.
Establishing a consistent feeding schedule and ratios transforms this scientific-sounding process into a manageable, five-minute daily habit. To keep your wild yeast thriving, follow this straightforward daily cycle:
- Discard: Scoop out and remove roughly half of the mixture from your jar.
- Weigh/Measure: Leave about a quarter cup (or 50 grams) of starter in the glass.
- Mix: Add equal parts of fresh flour and water (about a scant quarter cup of water and a slightly heaping quarter cup of flour) and stir until it resembles thick pancake batter.
- Mark: Scrape down the sides and slide your rubber band up to the new level.
Watching the jar after a fresh meal is where the real magic happens. Within a few hours of feeding, the yeast feasts on the new sugars, exhaling gas that gets trapped in the thick paste and causes the entire mixture to swell upward. You are looking for the “peak” of fermentation—the moment when your starter is at its most energetic, usually having doubled in size and showing a slightly rounded, domed top before it eventually collapses back down.
Repeating this predictable routine over the next few days will train your wild yeast to rise reliably and robustly. By day seven, you should notice a steady pattern of doming and bubbling within four to eight hours of every meal. When the culture routinely doubles in size and smells pleasantly yeasty, you have successfully cultivated a healthy, active companion, preparing it for the final milestone: the sensory test.
The Sensory Test: Is Your Starter Ready to Bake?
After a week of diligent feeding, you might be wondering exactly how long until the culture is ready to finally mix into a dough. You will know it is time when the mixture transforms from a simple flour paste into something that feels alive. A mature culture at its peak will double in size, but the real secret lies in its texture. If you gently drag a spoon through it, the inside should look incredibly webby and feel airy, much like a fluffy mousse.
To confirm those airy bubbles are trapped carbon dioxide ready to lift a loaf of bread, perform the classic floating test for maturity. Fill a small glass with room-temperature water. Carefully scoop a teaspoon of your bubbly culture and drop it in. If it bobs on the surface like a tiny raft, congratulations! The yeast has produced enough gas to make the batter buoyant, meaning it is strong enough for baking. If it sinks, it simply needs more time to build strength.
Timing your bake requires catching the yeast while it is full of energy, rather than waiting until it has exhausted its food supply. One of the clearest signs of an active and healthy starter is a slightly domed shape at the top of its rise. Conversely, a “hungry” starter will look flat, runny, and have streak marks on the glass where it has collapsed. It might also smell sharply acidic, contrasting with the pleasantly sweet, yeasty aroma of a ready culture.
Once you master these visual cues, you remove the guesswork from bread making and can rely on your senses instead of a strict clock. However, even carefully tended jars sometimes behave unpredictably as the kitchen environment changes. Knowing how to interpret distress signals—like when a mixture stops rising, develops a layer of dark liquid, or emits an unusually sharp odor—will save the culture.

Troubleshooting: Deciphering Hooch, Mold, and ‘Hungry’ Smells
Even the most diligent cultures occasionally throw a tantrum. When a starter stops bubbling, the culprit is usually a chilly kitchen rather than a failed process. Your jar is a microscopic ecosystem balancing wild yeast and lactic acid bacteria—the beneficial microbes responsible for that signature sourdough tang. Both thrive in warmth, and when temperatures drop, their metabolism slows to a crawl. Moving your jar to a cozy spot, like the top of the refrigerator, introduces simple temperature-controlled fermentation that will quickly jumpstart a sluggish paste back to life.
Panic often sets in when a sinister-looking dark liquid suddenly pools on top of the mixture. Ideally, a starter resembles thick, bubbly pancake batter, but a watery layer on top is a natural feature called “hooch.” It is simply harmless alcohol produced by yeast that has exhausted its food supply and is now genuinely hungry. You can either stir this liquid back into the batter for a sharper, more acidic bread flavor, or pour it down the drain before your next regular feeding.
Distinguishing between hooch and mold saves perfectly healthy cultures. To safely manage kitchen surprises, here is a quick ‘Fix-It’ chart for common distress signals:
- Symptom: Dark liquid (Hooch) or a sharp vinegar smell. Solution: Feed it! Pour off the liquid or stir it in, then provide a fresh meal of flour and water.
- Symptom: Fuzzy spots or pinkish-orange streaks. Solution: Toss it. These indicate harmful mold or bad bacteria. Wash the jar thoroughly and start over.
- Symptom: Flat, lifeless, and refusing to rise. Solution: Warm it up. Find a slightly warmer spot to wake the resting yeast.
Understanding these visual cues transforms you into a confident baker who knows exactly what their culture needs. These natural ferments are incredibly resilient, rarely requiring you to start entirely from scratch. Once your jar bubbles predictably and you feel comfortable handling occasional hiccups, you no longer need to be tied to a demanding daily routine. This adaptability fits easily into a busy schedule.
The ‘Lazy’ Baker’s Guide to Long-Term Maintenance
Daily feedings built your initial culture, but maintaining that schedule forever is exhausting. With the foundation established, your wild yeast is robust enough for a relaxed routine. Think of your refrigerator as a magic pause button. By shifting your jar from the warm counter to the fridge, you instantly reduce maintenance from a daily chore to a highly manageable once-a-week task.
Putting your culture into refrigerated hibernation requires minimal preparation. When you want to pause your baking, discard and feed your jar normally, but leave it on the counter for just an hour before chilling it. This brief rest gives the yeast time to start eating, providing energy for their slumber. Maintaining a healthy mother culture relies on the cold environment drastically slowing their metabolism, making that single meal safely last for seven to ten days without souring.
Even if you leave for a two-week vacation, your ecosystem will survive perfectly fine left completely alone. The secret to an extended pause is mixing in a little extra flour before you leave, creating a thick paste resembling dense peanut butter. This extra food ensures your yeast will not run out of fuel while you are away. Ultimately, the best starter is simply the one that fits seamlessly into your actual lifestyle instead of holding you hostage to a kitchen timer.
Waking your dormant pet back up involves a remarkably straightforward revival cycle. A day before baking, take the cold jar out of the fridge, discard half, and provide a fresh meal using slightly warm water. As the paste gradually reaches room temperature, the yeast will wake up, consume the fresh flour, and enthusiastically double in size within a few hours. Once your jar reaches that familiar, frothy peak, it is completely ready to be mixed into your first loaf of bread.
From Starter to Slice: Your Roadmap to the First Loaf
You have successfully captured wild yeast right in your own kitchen. That bubbly jar on your counter is no longer just flour and water; it is an energetic, living culture. You have mastered the straightforward routine of feeding and discarding, transforming basic pantry staples into a powerful natural lift for your future baking.
The greatest lesson you have learned isn’t a rigid formula—it is observation. Knowing exactly when to use a starter comes down to watching for that magical double in size rather than just blindly watching a clock. As the official keeper of this mother culture, you can now trust your senses. When it looks like a thick, airy sponge and smells pleasantly yeasty, it is ready to work.
Now it is time to transition from maintaining your starter to actually mixing bread dough, which easily fits into a standard 9-5 work schedule. Try this 24-hour ‘Baking Day’ countdown for your first loaf:
- Friday Evening: Feed your starter before bed so it rises and peaks overnight.
- Saturday Morning: Mix your active starter with fresh flour and water, letting the dough rest and rise while you enjoy your day.
- Saturday Night: Shape your dough and place it in the fridge to slow-ferment and develop flavor while you sleep.
- Sunday Morning: Bake your chilled loaf to crispy, golden perfection.
Every reliable starter ultimately leads to this rewarding moment. You are no longer just maintaining a curious jar on the counter; you are utilizing a centuries-old tradition of natural baking. The next time you slice into a warm, crackling homemade loaf, you will know exactly where that incredible flavor came from—your patience, your observation, and your very own wild yeast.